Tuesday, May 31, 2011

Satin Shoes and Pompoms

Instead of tossing out last year's satin mules, I revamped them with pompoms.

I made cute little 3-inch pompoms and glued them to the toes, 
and in an hour they were fabulous again!

You'll find it easy to do too, with the Pattiewack Pompom Tool and yarn.  

Saturday, May 28, 2011

Tie Dye Tutorials - Shibori - Brush - Scrunch

I love TIE DYE, and I decided to create 3 of the 5 Dye Techniques in this great Tulip kit.
I grabbed 2 kits, because I dyed 12 yards of fabric.

First step:
Pre-Wash - I washed and dried all the 100% cotton fabric 
to take out the sizing and prepare it for the dye.

Second Step:
Mixing - My steel sink is perfect for mixing the dyes. It's fast and easy because all I have to do is put on my gloves and then fill all the bottles with water (the dye is already in there) and shake.
Third Step:
Covered Work Table - Scott set up a table cover with plastic trash bags. Of course he used bungees to hold it down. I call him Bungee Man. (When I'm not calling him Zip-tie Man.)
SHIBORI DYE TECHNIQUE
I started with the shibori technique and since my project is so humongus, 
I taped the 2 tubes together that come in the kits.
Then I laid it under the fabric and scrunched it up. 
The shibori tube holds the fabric up so that you get that cool striped look, 
and keeps it from puddling. You'll see!
Now, the dying begins. I squirted it onto the fabric along the top of the tube. 
Then, I moved the tube over about 8 inches and repeated until I was at the end of the fabric.
Voila! I hung it on the clothesline and replaced the trash bag with a new one for the next color.
BRUSHED DYE TECHNIQUE
Woohoo, the brush technique was amazing. 
I simply poured my dye out of the bottle and into a disposable bowl, 
dipped my brush from the kit into the dye, and made crisscross strokes all the way across. 
Loved it.
SCRUNCHED DYE TECHNIQUE
After changing the trash bag on the table again, I was ready for the spray technique. 
This was soooo easy and fast. I made little hills and valleys with the fabric, 
then used the spray top from the kit to spray away.
4-Hour Dye Set:
I don't know what the neighbors think, 
but it sure gave them a colorful view while the dye set for 4 hours. 

Wash & Dry:
Last step, wash and dry the fabric separately and then make anything I want!

Wednesday, May 25, 2011

Girls Night Out - Event at JoAnns Store in Mt.Juliet, Tennesse

 
Girls Night Out at the JoAnn Fabric Store in Mt. Juliet, Tennesse was great fun Friday night!
 
When the store reopened the doors at 9:00, ladies were waiting for the door to open so they could be first to get in line for the fabulous tie dye scarves at the Tulip table.

 
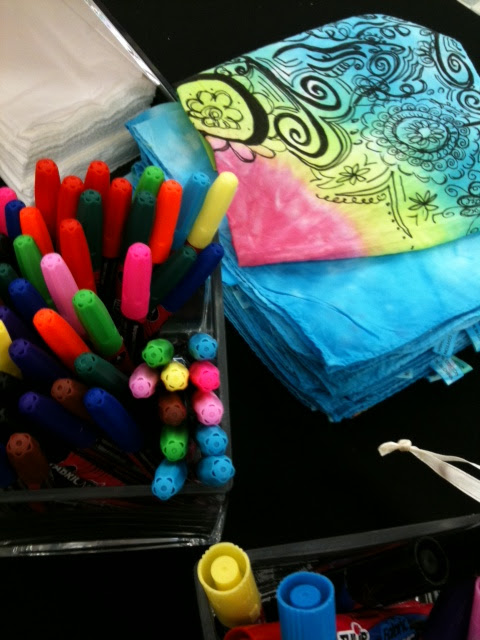
Some of the gals chose the hankies to paint and glitter.

There were around 300 crafty  ladies ready to craft and see what was new from iLoveToCreate.

 
Our booth was decked out in fresh flowers and a wire mannequin with silk tie-dyed scarves hanging around her waist, ready for the guest to pull off one at a time, and embellish with glitter and paint.
I even put on a little party dress for the special event.  Those heels didn't last very long, I have to say.  I was running back and forth like crazy to keep everyone happy with their special project.
 
I served up Tulip 3-D paint  and Glitter Bond in hot pink desert plates with our new Tulip Fashion Pouncers.  They made perfect polka dots on the scarves, and were a BIG hit!

 
Everyone seemed to love the glitter high heeled shoes, too.

We had some pretty creative scarves made by some pretty proud crafters!

The crowd was busy all night, up until 11:30 when we passed out our final product give-aways and gave away the last of our scarves at the make-it-take-it table.

The event was coordinated by the JoAnns Fabric store, and was by invitation only, through their preferred customers.  Everyone was so excited to be there.

The silk scarves that we pre-dyed at the iLoveToCreate studio were gorgeous with all the pretty colors of dye that we have to choose from, and they were super easy to make.

 
There were markers, dimensional paint, sprays, glitter, soft fabric paints to choose from for embellishing the scarves, and it was tough deciding on just one thing to do.

Our table was one of the first ones to make an impression on the guests when they walked into the store.  I loved being in front of the fabric department where all the gorgeous colors of fabric were displayed behind me.

Doodling with the fabric markers was uber easy, and the gals loved doing it.

 
Tying the scarves onto the mannequin made a nice display, and it was fun to pull them off one at a time.

 
Thanks to everyone at the Mt. Juliet JoAnns store for a fabulous
Girl's Night Out!

Saturday, May 21, 2011

Happy Graduation Tshirt - Graduation Countdown!

 
Happy Graduation!
Put a smile on the face of your favorite graduate, with this DIY smiley face graduation t-shirt.
You can't help but giggle when you see this cute smiley face, and you can paint the cap any color to match your grad's school colors.
The complete instructions and supplies you'll need are at iLoveToCreate.com along with tons of other ideas for your creative graduate.

Friday, May 20, 2011

Tie Dye Graduation Banner - Graduation Countdown!

Party Pennants for the Graduation Party!
Your party will be one they are tal
It's super fun, and would be a great keepsake long after the party.  
You'll find the instructions at iLoveToCreate.com and 
the tie dye in the shopping pages at the tip of your fingers. 
What a great idea!
There are more great ideas coming, so keep checking back for my graduation countdown!

Thursday, May 19, 2011

Chalkboard Placemats - Graduation Countdown!

DIY Chalkboard Placemats are no-sew!
These are so cute for the graduation party, or every day for that matter.  The kids will love them because they can doodle and draw while they wait for the party treats to be passed around.
The instructions are at iLoveToCreate.com and all you need are placemats in your school colors, chalkboard fabric, and Aleene's adhesives.

Wednesday, May 18, 2011

Chocolate Graduation Pops - Graduation Countdown!

Chocolate graduation caps make a perfect party centerpiece!
We are all crazy about cake pops, but these are adorable for you grad's special day.  Show up with these for the party, and you'll better have at least 2 for everybody!
The iLoveToCreate design studio was buzzing on a sugar high the day I made these.  The cute little pots are hand painted ceramics from Duncan, and the little balls of tissues are Tacky-glued into foam balls.  The instructions are at ilovetocreate.com, and you won't believe how simple they are!

I've got more ideas coming, so keep checking back for my graduation countdown!

Tuesday, May 17, 2011

Autograph Pillow - Graduation Countdown!

An autograph pillow is a must-have for the graduate!
When I made this one, the gals in the iLoveToCreate design studio were giggling at how cute it is.  The square pillow mimics a graduation cap, and the crystals will remind your grad of their favorite year.  This is a great gift, and the grad will appreciate it forever when their BFFs sign it in permanent markers.  The instructions are at ilovetocreate.com and if you don't want to sew the pillow, simply buy a square pillow in the school color, add the center button and tassle, and heat-set crystals to finish it.  Easy-peasy!

I'll be posting more graduation ideas, so keep coming back for my graduation countdown!

Monday, May 16, 2011

Tie Dye Chair Covers - Graduation Countdown!


Graduation 2011 is coming!  
And here's a great idea for the graduation party.  It's Tie Dye Chair covers that you can dye in your school colors.  I did these in the iLoveToCreate design studio to go along with our red and black theme.  They were super easy to make.  The complete instructions are on ilovetocreate.com.  

I'll be posting more ideas as we countdown to graduation day!