Showing posts with label DIY tie dye. Show all posts

Monday, August 15, 2011

Tie Dye Tablecloth Tutorial

This tie dye tutorial started out as a simple table skirt to go around a table that we are getting ready to take to an event for iLoveToCreate. But, as you probably have heard me say many times.... if it's worth doing, it's worth doing abundantly! A long time ago... longer than I want to admit... I sold Home Interiors which was founded by Mary Crowley, and this was one of the things she use to say to all of us decorators, and it stuck with me to this day. I love doing things over the top.


So, here's a pic of how it turned out. 


I love it so much that I want to wrap myself up in it!

 
Step 1: Measure
My first step was to do the measurements of the table and jot it down.
Then I got busy and started cutting and sewing.
I used white 100% cotton muslin, so it would dye beautifully.
  •  
  •  
Step 2: Sew
It's BIG!  According to my measurements, to wrap all the way around the table, it's 4 feet (front of table) plus 4 feet (back of table) plus 2 feet (one end of table) plus another 2 feet (other end of table) for a grand length of 144 inches long. 

So, 4 yards long x 32 inches wide for the base, after hemming all the edges.  I put a 3-inch hem in the bottom so that it would drape nicely. 
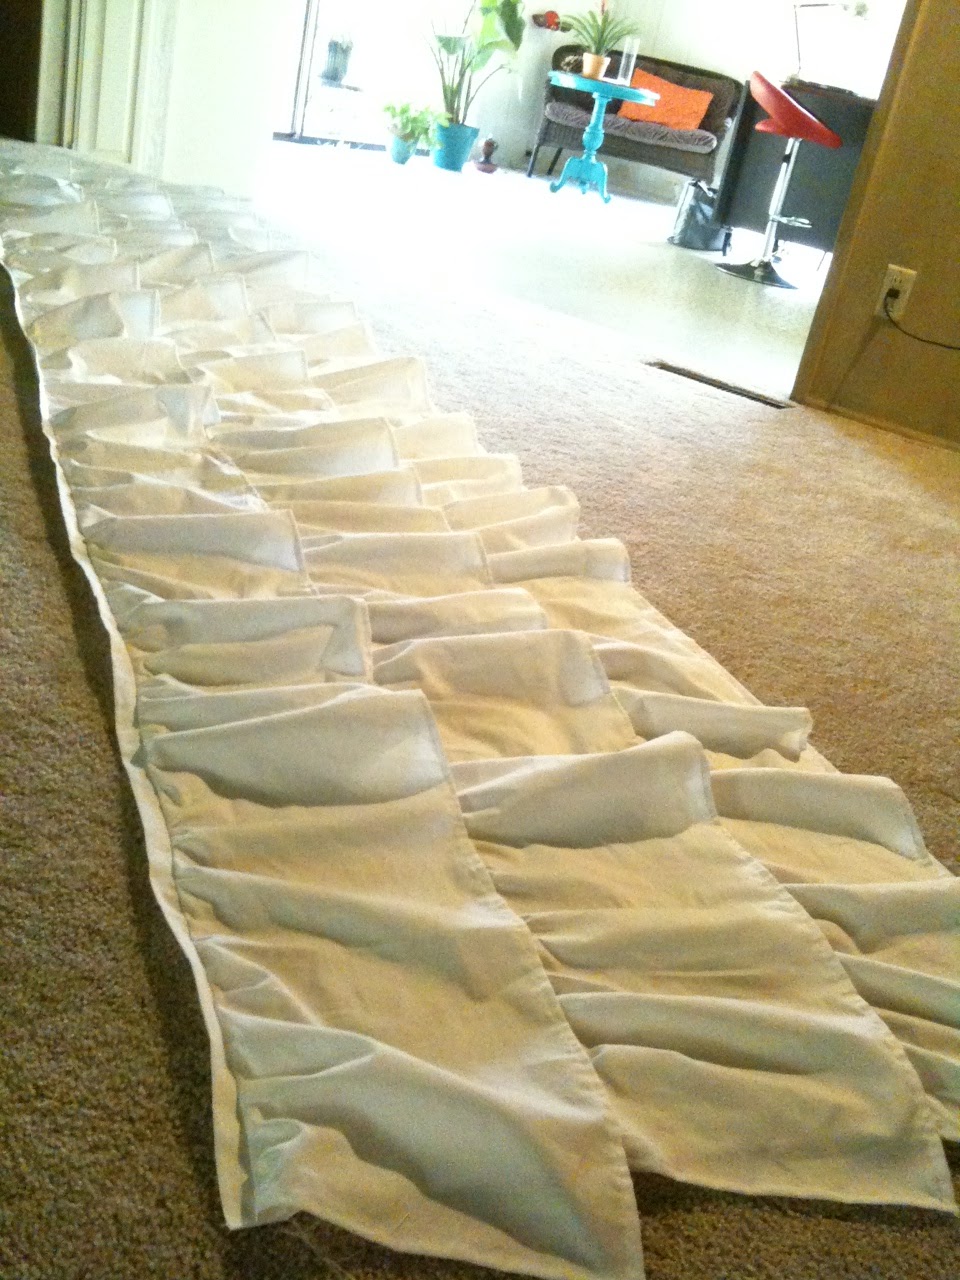
Next came the ruffles.  I wanted 3 ruffles, overlapping each other 2 inches.  So, I cut them 12 inches wide.  For just enough fullness, I made them 1.5 times longer than the length of the skirt, so each one is 12 x 216 inches.  I didn't actually cut anything; I ripped it since the muslin is a straight grain.  Perfect!
I hemmed the ends and bottom of each ruffle, then sewed a long stitch at the top of each one for gathers, pinned them onto the base skirt, pulled the threads to gather the top of each ruffle, and sewed them on.

Step 3: Dye
Now I was ready for the dye....the FUN part!

The fabric needed to be wet to absorb the dye, so I tossed it in the washer for a quick rinse and spin.
I already had squirt bottles from other dye kits, so I chose the new Tulip® One-Step Dye™ Refills that have 3 packs of dye in jelly-like packages that I simply dropped in the bottles and added water.  Be sure to shake them up until the jelly packs dissolve completely. 
 I used one bottle with 2 dye packs for each line of dye.  As you can see, I did 4 lines of dye across the skirt.  With that much fabric, I knew it needed lots of dye.
 
Step 4: Wrap & Wait 4 hours
I wrapped the whole thing in a painter's drop cloth that I already had, and left it for 4 hours outside in the Fresno sun.  I admit, I kept peeking at it to see how pretty it was.  


Step 5: Rinse & Dry
The last step was to rinse it out in the washer and dry it.

And of course, it needed the wrinkles out, so hubby Scott hung it on c-stands which made it uber-easy to steam.

Now, I'm all ready to make cool things on my decked-out table.

Tuesday, July 12, 2011

Tie Dye Teepee

Allee Marderosian added a twist to summer camp fun with a tricked-out tepee! Get the whole group in on this awesome activity with the Tropical Twist Tulip® One-Step Tie-Dye Kit™ and Tulip® Soft® Fabric Paint for a project that’s as bright as their summertime smiles.

Saturday, May 28, 2011

Tie Dye Tutorials - Shibori - Brush - Scrunch

I love TIE DYE, and I decided to create 3 of the 5 Dye Techniques in this great Tulip kit.
I grabbed 2 kits, because I dyed 12 yards of fabric.

First step:
Pre-Wash - I washed and dried all the 100% cotton fabric 
to take out the sizing and prepare it for the dye.

Second Step:
Mixing - My steel sink is perfect for mixing the dyes. It's fast and easy because all I have to do is put on my gloves and then fill all the bottles with water (the dye is already in there) and shake.
Third Step:
Covered Work Table - Scott set up a table cover with plastic trash bags. Of course he used bungees to hold it down. I call him Bungee Man. (When I'm not calling him Zip-tie Man.)
SHIBORI DYE TECHNIQUE
I started with the shibori technique and since my project is so humongus, 
I taped the 2 tubes together that come in the kits.
Then I laid it under the fabric and scrunched it up. 
The shibori tube holds the fabric up so that you get that cool striped look, 
and keeps it from puddling. You'll see!
Now, the dying begins. I squirted it onto the fabric along the top of the tube. 
Then, I moved the tube over about 8 inches and repeated until I was at the end of the fabric.
Voila! I hung it on the clothesline and replaced the trash bag with a new one for the next color.
BRUSHED DYE TECHNIQUE
Woohoo, the brush technique was amazing. 
I simply poured my dye out of the bottle and into a disposable bowl, 
dipped my brush from the kit into the dye, and made crisscross strokes all the way across. 
Loved it.
SCRUNCHED DYE TECHNIQUE
After changing the trash bag on the table again, I was ready for the spray technique. 
This was soooo easy and fast. I made little hills and valleys with the fabric, 
then used the spray top from the kit to spray away.
4-Hour Dye Set:
I don't know what the neighbors think, 
but it sure gave them a colorful view while the dye set for 4 hours. 

Wash & Dry:
Last step, wash and dry the fabric separately and then make anything I want!

Wednesday, May 25, 2011

Girls Night Out - Event at JoAnns Store in Mt.Juliet, Tennesse

 
Girls Night Out at the JoAnn Fabric Store in Mt. Juliet, Tennesse was great fun Friday night!
 
When the store reopened the doors at 9:00, ladies were waiting for the door to open so they could be first to get in line for the fabulous tie dye scarves at the Tulip table.

 
Some of the gals chose the hankies to paint and glitter.

There were around 300 crafty  ladies ready to craft and see what was new from iLoveToCreate.

 
Our booth was decked out in fresh flowers and a wire mannequin with silk tie-dyed scarves hanging around her waist, ready for the guest to pull off one at a time, and embellish with glitter and paint.
I even put on a little party dress for the special event.  Those heels didn't last very long, I have to say.  I was running back and forth like crazy to keep everyone happy with their special project.
 
I served up Tulip 3-D paint  and Glitter Bond in hot pink desert plates with our new Tulip Fashion Pouncers.  They made perfect polka dots on the scarves, and were a BIG hit!

 
Everyone seemed to love the glitter high heeled shoes, too.

We had some pretty creative scarves made by some pretty proud crafters!

The crowd was busy all night, up until 11:30 when we passed out our final product give-aways and gave away the last of our scarves at the make-it-take-it table.

The event was coordinated by the JoAnns Fabric store, and was by invitation only, through their preferred customers.  Everyone was so excited to be there.

The silk scarves that we pre-dyed at the iLoveToCreate studio were gorgeous with all the pretty colors of dye that we have to choose from, and they were super easy to make.

 
There were markers, dimensional paint, sprays, glitter, soft fabric paints to choose from for embellishing the scarves, and it was tough deciding on just one thing to do.

Our table was one of the first ones to make an impression on the guests when they walked into the store.  I loved being in front of the fabric department where all the gorgeous colors of fabric were displayed behind me.

Doodling with the fabric markers was uber easy, and the gals loved doing it.

 
Tying the scarves onto the mannequin made a nice display, and it was fun to pull them off one at a time.

 
Thanks to everyone at the Mt. Juliet JoAnns store for a fabulous
Girl's Night Out!