Sunday, October 31, 2010

31 Days of DIY Halloween - Pumpkin Mummy

mummikin

Isn't this cute Mummy pumpkin by my friend Cheryl Ball to die for (or should we say to DIY for)? Whahaha! If you are wanting to do a scary/spooky pumpkin that is still kid-friendly, then this one is for you! This pumpkin project will definitely be one that you'll get so wrapped up over making!

Materials:
Tulip® 3D Fashion Paint™
65000 White
65038 Black
65130 True Red
Aleene's® Fast Grab™ Tacky Glue
– Craft foam – white, black
– Pencil
– Low-tack masking tape
– Paper towels
– Gauze – 1 yard
– Pumpkin
– Plastic bugs
– Scissors

Instructions:
1. Use pencil to draw two oval eye shapes onto white craft foam then cut out.
2. Start 3D Fashion Paint on paper towel using an even pressure on bottle for a smooth line. Paint a black circle in centers of foam circles, True Red veins to edges then White highlights on black. Let dry.
3. Draw and cut a triangular nose and mouth shape from black craft foam.
4. Use Fast Grab to glue face pieces in place as shown, using small pieces of tape to hold in place until dry if needed.
5. Cut gauze into 2” wide strips by the length of gauze. Add a dot of glue to one end then press to back of pumpkin. Start wrapping strip around pumpkin, adjusting around facial features as shown. Glue on more strips as needed to cover pumpkin. Wrap stem then tie knot with ends.
6. Use True Red to create “cuts” and “drips” where desired. Let dry.
7. Glue bugs in place and let dry.

Craft on! Click here for today's daily giveaway!

Saturday, October 30, 2010

31 Days of DIY Halloween - Kids Halloween T-shirt

boo tee
Here's a super fun way for kids or kids at heart to get their creativity on this Halloween! You even get to have ooey gooey fun when you dip your hands in the paint to turn your handprints into spooky ghosts! This is a great project for those kids who think they might be a little too old to dress up, but still want to wear a cool Halloween shirt!

Materials:
Tulip® Fashion Form™
Tulip® Sponge Brushes™
Tulip® 3D Fashion Paint™
65131 Orange
65177 Green Glow
Tulip® Soft Fabric Paint™
BI15784 Glacier White
– Baby wipes
– Paper towels
– White chalk
– T-shirt – black – 100% cotton
– Foil

Instructions:
1. Insert Fashion Form into T-shirt to prevent paint seepage.
2. Squeeze a generous puddle of Glacier White Soft Fabric Paint onto a piece of foil. Use dry 1” foam brush to apply a thin even coat to palm and fingers on right hand, avoiding thumb. Position right hand so fingers point toward hem, and place in center about 2” below neckline. Having fingers slightly closed, press hand onto fabric firmly, making sure all paint has adhered. Carefully lift hand then repeat step with same hand to create next ghost, leaving about 1” space between handprints. Clean hands with a damp paper towel or baby wipe.
3. Use white chalk to lightly draw a “B” the same size as ghosts. Refer to photo.
4. Test flow of Orange Slick 3D Fashion Paint on paper towel. Squeezing with even pressure on bottle for a smooth line, follow chalk line of “B” letter.
5. Use Orange Slick to add oval shaped dots for eyes and mouth on each ghost.
6. Use Green Glow 3D Fashion Paint to outline letter and ghosts. Refer to photo. Add random dots around shirt where desired.
7. Let dry. Follow label instructions for care of garment.

Craft on! Click here for today's daily giveaway!

Friday, October 29, 2010

31 Days of DIY Halloween - Ceramic Black Cat - Trick or Treat

trick or treat cat
This sleek icon of the holiday is accented with Dark Black Concepts™® and Dark Purple highlights, and bright French Dimensions™ candy corn. What a treat!

Supplies:
– Duncan® Concepts® Underglazes for Bisque and Majolica
CN 253 Dark Black
CN 263 Dark Grape
Signature Brushes
SB 807 No. 6 Fan Glaze
SB 808 No. 4 Round
French Dimensions™
FD 258 Pure White
FD 265 French Straw
FD 266 French Papaya
FD 269 French Plum
Clear Glazes
IN 1001 Envision Clear Glaze
– Sponge, dampened
– Duncan mold; A Cat DM 2304
– Scissors
– Pencil
– Carbon Paper
– Contact® Paper
– Foil Paper
– Patterns (click here for pattern)

Instructions:1. Clean greenware, using TL 401 Cleanup tool. Smooth ware with damp sponge. Fire to shelf cone 04.
2. Remove dust and condition ware, using dampened sponge.
3. Trace letters on Contact Paper, using carbon paper and pencil. Cut out with scissors.
4. Remove paper backing from Contact Paper. Press letters down on cat to avoid lifting.
5. Apply 3 coats of CN 253 Black to entire cat, using SB 807 #6 Fan Glaze, leaving spine of cat, inside of ears, eyes and all curves blank. Let dry between coats.
6. Apply 2 coats of CN 263 Dark Grape to all other areas that were left blank, using SB 808 #4 Round. Let dry.
7. Remove letters. Outline with FD 266 French Papaya.
8. Add candy corn using FD 266 French Papaya, FD 265 French Straw and FD 258 Pure White by squeezing out paint one color at a time in shape of candy. Refer to photo for placement. Let dry.
9. Add random dots on background, using FD 269 French Plum. Let dry completely.
10. Apply 2 coats of IN 1001 Clear Glaze to letters and 1 coat to remainder of cat, using SB 807 #6 Fan Glaze.
11. Let dry. Stilt and fire to shelf cone 06.

Thursday, October 28, 2010

31 Days of DIY Halloween - Cute Critter Pillows

monster-pillows

Clean out your fabric stash and make this Halloween spooktacular with pillows that are just too cute! Thanks to Aleene’s® Fabric Fusion™ this is a totally no-sew project that is a quick and easy way to add fun and color to your Halloween festivities.

Materials:
Aleene's® Fabric Fusion® Permanent Dry Cleanable Fabric Adhesive
– 2 Pillows
– Zipper - optional
– Scissors
– Buttons
– Yarn - optional
– Lots of fun, funky fabric

Instructions:1. Pick fun fabric to create pillow face.

2. Cut different shapes from fabric, making sure to cut out multiple layers!

3. Once mouth and eyes are cut out, play around with positioning on pillow. When in desired position, apply Fabric Fusion to back
of each layer and press on pillow.

4. When layers for eyes are complete, finish off by gluing on a button with a drop of Fabric Fusion.

5. When face is finished, add some finishing touches like the bandaged heart and cherries! Give the little critter some colorful hair by gluing yarn to top of pillow.

6. Let pillows sit to dry then enjoy!

Craft on! Click here for our daily giveaway!

Wednesday, October 27, 2010

31 Days of DIY Halloween - Bat Puppet

bat puppet

How fun is this? The kids will think you're a genious when you make your own felt glove and turn it into an awesome bat with Aleene's® Foamtastic® ! And for a really girlie girl bat, add a darling little bow!

Materials:
– Aleene's® Foamtastic®
Pompons, orange, 1¼”
Felt, black, 2 squares
Fun Foam, black, orange
Scissors
Peeper eyes, 20mm
Clothespins
Pipe cleaners, yellow
patterns (click here for patterns)

Instructions:
1. Cut two glove and ear patterns from black felt, two wings from black Fun Foam and two inner ears from orange. Glue orange pieces inside ears.
2. Squeeze out an Orange line from top point of wings to bottom. Set aside to dry.
3. Glue peeper eyes to orange pompons.
4. Cut 3” pieces of pipe cleaners for fangs. Pierce two holes in upper part of mouth and insert pipe cleaners and pull.
5. For legs, cut a strand of pipe cleaner in half. Cut second strand into four pieces. Twist two shorter pieces together in center to form claws. Twist larger strand onto feet for leg.
6. Pierce two holes in felt glove and insert legs, coiling reverse side to secure.
7. Fit both gloves parts together. Apply glue to edges of one side, leaving 1” open for mouth. Position mouth and glue entire glove, leaving opening for hand. Secure with clothespins.
8. Glue wings to back of glove. Secure with clothespins.

Craft on! Click here for today's daily giveaway!

Tuesday, October 26, 2010

It's TERRORIFIC Tuesday!!! Halloween Crafts & Ideas

TT Week 4 2010
You're gonna love these terrorific halloween crafts for your parties, decorations,


Vanessa shows us how to make a Cute Felt Pumpkin in just a few minutes!


Get creative with Eileen Hull with her Pop Up Bat card. Super festive!


Glory makes a beautiful Autumn Wreath to hang on your door or wall.


Erika shares with us her cute Halloween bandana that her dog Sebastian loves wearing!


Cheryl Ball wows us with an adorable Jack-o-lantern Pin perfect for the season!


Sew a sweet Pumpkin Placement with Phyllis Dobbs!


Crafty Chica gets her glow on with this Sci Fi Senorita Head that is totally spooky!


Crafterella offers up some downloadable custom labels that are super spooky and fun!


Make a spooky Undead Terrorarium with Silvia Chenault.


Whip up some cute and quirky Moss Monsters with Missy at Marvelously Messy!


Kate Pullen offers up a fun Pumpkin Favor Box perfect to hand out at Halloween parties!


Get into the fall spirit with this Pretty Fabric Flower from Ann Butler.


Pattiewack crafts up some Mummy Barbies perfect for a haunting Halloween display!


Alexa a.k.a. Swelldesigner makes a bold Orange and black Mary Jane candy wreath, perfect for hanging or eating!

31 Days of DIY Halloween - Twilight T-shirts

twilight romance tshirts

Allee created these insanely cool t-shirts for Twilight lovers everywhere. She used 3-D and soft paints for a romantic and soft yet edgy look. You could wear them on a date, or dress them up for a party with a little flirty red skirt and pumps.

Tulip® Fashion Form™
Tulip® 3D Fashion Paint™
65000 White
65038 Black
65130 True Red
Tulip® Soft Fabric Paint™
BI15790 Crimson Red
– Paper plate
– Computer
– Contact paper
– Gray chalk pencil
– Paper towels
– Men’s T-shirt – black
– Felt pen
– Makeup sponge
– Printer
– Women’s T-shirt – white
– Craft knife

“Love Bites” Women’s Tee1. Prewash and dry T-shirt. Insert Fashion Form between layers of tee.
2. Type out the words “Love Bites” on computer in desired font and size then print. Flip wording over and trace over letters with chalk pencil. Flip back over and place chalk side down onto top of tee. Refer to photo for placement. Rub hands over paper, transferring lettering onto tee.
3. Start flow of Black Slick 3D Fashion Paint on a paper towel, applying an even pressure on bottle for a smooth line. Trace and color in “Love Bites” with Black Slick. Refer to photo. Let dry.
4. Use felt pen to draw (or trace) a large heart onto contact paper. Use craft knife to cut out heart, leaving outside edges intact. 5. Peel backing from heart stencil and place onto tee where shown. Run a finger around edges to prevent paint seepage.
6. Squeeze a puddle of Crimson Red Matte Soft Fabric Paint onto a paper plate. Dab flat end of makeup sponge into paint then dab onto fabric within stencil. Let dry then repeat until desired opacity is reached. Let dry.
7. Squeeze two dots of White Slick onto upper portion of heart. Let dry, then use True Red Slick to create “blood” dripping out from white dots. Refer to photo.
8.Use Black Slick to outline heart and blood drips. Let dry.

“Killer Love” Men’s Tee1. Prewash and dry T-shirt. Insert Fashion Form between layers of tee.
2. Type out the words “Killer Love” on computer in desired font and size then print. Flip wording over and trace over letters with chalk pencil. Flip back over and place chalk side down onto top of tee. Refer to photo for placement. Rub hands over paper, transferring lettering onto tee.
3. Start flow of White Slick 3D Fashion Paint on a paper towel, applying an even pressure on bottle for a smooth line. Trace and color in “Killer Love” with White Slick. Refer to photo. Let dry.
4. Use felt pen to draw “slash” marks onto contact paper. Refer to photo. Use craft knife to cut out marks, then peel backing from stencil and place onto tee where shown. Run a finger around edges to prevent paint seepage.
5. Squeeze a puddle of Crimson Red Matte Soft Fabric Paint onto a paper plate. Dab flat end of makeup sponge into paint then dab onto fabric within stencil. Let dry then repeat until desired opacity is reached. Remove stencil and let dry.

Craft on! Click here for today's daily giveaway!

Monday, October 25, 2010

Barbie Crafts - Mannequin Mummy - Halloween Fondue Party


Happy Halloween to all you ghouls and guys! I hope you’re busy making plans for a frightfully fun evening with your friends and families this weekend.

I thought you might like to see some frightfully fun ideas I used for a fondue party, make Barbie doll mummies, AND turn my mannequin into a mummy for a terrorific party.


I have a bouquet of Barbies in my home studio. I just KNEW they would come in handy for something, and yes! I wound bathroom tissue around them and turned them into Mini-Mummies! A little tacky glue holds them together.
It didn't take very long to wrap the Barbies, and they turned out so cute! That's a plaster cast of Scott's hand holding onto one of the mini-mummies. I made it years ago, and I use it for a candle holder.


I have a collection of body parts. Don't ask why, it might be the artist in me. I just love them. That's my hand with the finger pointing up. I use it for a bracelet holder.


I also have a paper mache mannequin that I keep turning into different pieces of art.  It was perfect for turning into a conversation stimulator at parties and gatherings at our house. 


The eyeball looking out the window, looks pretty creepy, peeking out of the mummy wrappings.


Here's how I made my mannequin mummy:

First, I wrapped up my mannequin with toilet paper and lace.  (yes, really!)  I had a ton of vintage lace from my mom, and wrapped it around the mummy to add a little texture. I promise you, that no vintage lace was harmed in the making, as I didn’t even cut it! That way I can take it off and use it on a sewing project.I think that some of the lace is probably 50 years old.

I used two rolls of tissue, and a bunch of tape on the big mannequin mummy. I love how it turned out, and it was toooo easy! Our guests loved it, and I don’t think I’ll want to take it down after Halloween, especially after spending all that time to make. But, it was worth it.

We love fondue, too. I make two pots, one with cheese and one with chocolate. I always ask the girls to bring fruits and veggies. And I always ask the boys to bring wine and beer. Yummers.

The fondue recipes I love to share are below. I went online to get recipes, and then changed them up a bit to fit what we like to eat. You can do the same thing. We don't eat much meat, but I found these amazing sausages made with chicken and sun dried tomatoes. You can use whatever cheese you love in the cheese fondue, and whatever liqueur that you prefer in the chocolate, like amaretto or rum. I hope you enjoy yourself and be safe, and have fun planning your party.
Happy Halloween everyone!


Killer Cheese Fondue
From the kitchen of: Pattie Donham-Wilkinson

2 - 8 oz. Pkgs. Cream Cheese, cut up in chunks
1 – Round of Brie Cheese, cut up in chunks
1 – Block of Gruyere Cheese, shredded
1 – Dark Lager Beer

Place cheeses in a large bowl, and pour the beer over the cheese, stirring it in. Melt slowly in the microwave, stirring frequently with a wooden spoon until melted. Pour into a fondue pot, and light the flame underneath to keep warm.
Serve with:

Sour dough bread chunks
Blanched broccoli
Sausage bites (pre-cooked)
Deglet Noor pitted dates
Honey crisp apples (our favorites)
Oh, and open a can of those crunchy fried onions to dip into, after you dip into the cheese, and prepare for your eyes to roll back in your head!


Death By Chocolate Fondue
From the kitchen of: Pattie Donham-Wilkinson

1 – 11oz. Pkg. Ghirardelli semi-sweet chocolate bits
1 – 11oz. Pkg. Ghirardelli milk chocolate bits
1/2 Pint Whipping cream
1/2 Cup Kahlua liqueur

Place chocolate bits in a large bowl, and pour the cream and liqueur over the chocolate, stirring it in. Melt slowly in the microwave, stirring frequently with a wooden spoon until melted. Pour into a fondue pot, and light the flame underneath to keep warm.
Serve with:
Marshmallows
Crushed graham crackers
Strawberries
Chunks of Fresh Pineapple
Apple chunks
Shredded coconut

31 Days of DIY Halloween - Halloween Yard Art

halloween yard stakes

Who doesn’t love a little yard art? These are perfect to point the way to the party and they are super easy to make. Just poke them anywhere, like down the driveway, or in potted plants. And if you store them flat, you can use them year after year.

Materials
Aleene’s® Crystal Clear Tacky Spray™
– Pencil
– Scissors: straight edge and wavy edge
– Newspaper or large plastic
– Easy release tape
– Cardstock: 12” squares 3 orange, 3 lime, 5 black, 1 Violet
– Paper
– Balsa, 3 strips 3/16”
– Patterns (click here for patterns)

Instructions:1. Enlarge patterns to fill most of a 12” square of cardstock. Cut shapes out and tape to appropriate cardstock. Bat, pumpkin mouth, stem and eyes and circles on black. Use orange for pumpkin and lime for Boo letters. Cut shapes out.

2. To protect work area, place newspaper or plastic on a level surface and use this area for all spraying of glue.

3. Lay letters BOO and black circles on newspaper and spray back with Tacky Spray. Quickly pick up pieces and place on orange cardstock. Refer to photo for placement. Trim edge of orange cardstock with wavy edge scissors. Spray back and place on full sheet of lime cardstock.

4. Repeat spray instructions with eyes, mouth and stem on pumpkin. Attach this unit to violet cardstock. Trim edge with wavy scissors and attach this unit to full sheet of orange cardstock.

5. Spray back of bat and attach to lime and trim edge with wavy scissors and attach to black cardstock.

6. Working quickly, spray back of a piece of black, lay on a clean work surface and lay one balsa stick in center about 3” down from the top of cardstock. Spray back of one layered design units with wavy edge and place on top of stick, centered on black cardstock. Firmly press papers together with hands.

7. Repeat with other two designs.

Craft on! Click here for today's daily giveaway!

Sunday, October 24, 2010

31 Days of DIY Halloween - Glow in the Dark Trick or Treat Bag

tote bag

Glow in the dark crafts are so much fun for the kiddos. You can pick up a fist full of Tulip® 3D glow paints and a pack of canvas bags to keep the kids busy creating their own version to hold all their loot. And when the lights are out, they'll still be able to find their candy stash!

Materials:
Tulip® Sponge Brushes™
Tulip® 3D Fashion Paint™
65175 Yellow Glow
65176 Orange Glow
65177 Green Glow
– Self-adhesive shelf paper
– Paper towels
– Iron
– Cardboard cut to fit inside tote
– Light colored chalk sharpened to a point
– Permanent felt pen
– Scissors
– Ribbon – black, orange – 12” each
– Foil
– Scissors
– White Tote Bag
– Patterns (click here for patterns)

Instructions:
1. Iron bag smooth then insert cardboard.
2. Place shelf paper, shiny side up, over pumpkin pattern then use felt pen to trace onto paper.
3. To create stencil, use scissors to cut out inner circle, leaving edges intact. Peel paper backing from stencil, position in place on tote then press to secure. Run a finger along inside cut edges to prevent seepage.
4. Shake bottle of Orange Glow 3D Fashion Paint. Squeeze a large puddle into center of circle. Using 1 ¾” Sponge Brush, lightly spread paint in an even layer, adding more paint as needed. Carefully remove stencil. Let dry.
5. Test flow of Green Glow paint on paper towel, using an even pressure on bottle for a smooth line. Add stem to pumpkin where shown.
6. Squeeze a puddle of Green Glow onto foil. Use the side of 1¾” sponge brush to paint leaves of pumpkin. Dip side of brush into paint then tap onto foil making sure paint is even on side. Position side of brush on tote then slightly wiggle to release paint. Repeat step dipping into paint for each leaf. Let dry.
7. Loosely cut apart words. Turn pattern over, hold up to window then trace over words with chalk on back of pattern. Position word on tote, chalk side down, hold in place with hand firmly run fingers over lines to transfer chalk to fabric. Repeat with remaining words.
8. Paint over words with Glow paint using color shown, adding several lines for each letter.
9. Detail pumpkin with Yellow swirl eyes and nose and a wavy Green line for mouth. Add random Orange dots on remainder of bag.

Craft on! Click here for today's daily giveaway!

Saturday, October 23, 2010

31 Days of DIY Halloween - Little Ladybug Costume

ladybug costume
This is absolutely darling, and believe it or not, it’s just t-shirts!! A couple snips, a few quick stitches and you can make your little lady the cutest little bug on Halloween night!

Little Ladybug Costume

Materials:

Tulip® Glam-It-Up!™ Fashion Art Tweezers™
Tulip® Cordless Heat Setting Tool™
– Tulip® Glam-It-Up!™ Iron-On Crystals™
23123 300 Clear Pack
25621 Red
– 1 T-shirt, black
– 2 Pom Poms, 2” black
– 2 sheets Felt, stiff black
– Scissors
– 1 Headband, black
– Straight pins
– Tailor’s chalk
– Sewing machine /matching thread
– 1 T-shirt, red
– 2 Pipe cleaners, black
– pattern (click here for pattern)

Instructions:
1. Cut sleeves off red shirt, using scissors.
2. Place plate on black T-shirt. Trace six circles with tailor’s chalk. Cut out and pin circles on red shirt.
3. Thread sewing machine with black thread. Sew on all circles.
4. Place wing pattern on stiff felt. Trace around with chalk. Cut out two.
5. Flip red shirt to back. Place wings in center top of shirt. Refer to photo. Pin in place.
6. Sew only center edge of wings on shirt. Refer to photo.
7. Place red Crystals around inner edge of each circle, using Tweezers.
8. Heat Heat-Setting Tool following package instructions. Gently place tip of Tool on top of Crystal. Hold for about 5 to 6 seconds. Repeat for all Crystals.
9. Outline wings with clear Crystals. Refer to photo.
10. Tip: If you have some black t-shirt leftover, make long armbands.
11. Twist one end of a pipe cleaner around a pom pom. Repeat with other pom pom and pipe cleaner. Wrap other end of pipe cleaner around headband.

Craft on! Click here for today's daily giveaway!

Friday, October 22, 2010

31 Days of DIY Halloween - Lady Gaga Costume

lady gaga outfit

I wanted to make a costume that looks like lady gaga, but it was hard to pick just one. I decided to go with this one, because I knew I could turn one black t-shirt into a SKIRT, and another black t-shirt into the TOP. Oh, and the crazy hair-bow/wig was a totally crazy idea I had to cut up a wig and glue it into a big bow on a headband. I love how it turned out, and how fast you can look like a super star! Karaoke, anyone?

Materials:
Aleene's® Fabric Fusion® Permanent Dry Cleanable Fabric Adhesive
– Wide headband
– Black thread
– Safety pin
– Rubber band
– Sewing machine
– Straight pins
– Blonde wig with bangs
– Craft stiff felt rectangles – (3) black and (1) yellow – 12”x22”
– 5/8” Black ribbon – 7 yards
– Scissors
– 5/8” Silver ribbon – 7 yards
– T-shirts – (2) black

Skirt:
1. Cut top off T-shirt from under the arms, straight across.
2. At top, turn under 1-inch and sew all the way around to form casing for ribbon.
3. At front and center, snip two slits in casing, 1-inch apart.
4. Hook a safety pin into the end of black ribbon. Push into one slit in casing and out the other slit.
5. Tie ends of ribbon to fit waist.

Top:
1. Cut stiff felt into a scalene triangle measuring 12” x 18” x 22”.
2. Glue ribbon in rows across the entire triangle, using Fabric Fusion. Pin in place until dry.
3. Glue embellished triangle to front of T-shirt, using Fabric Fusion. Refer to photo for placement. Pin in place until dry.
4. Cut stiff felt into an isosceles triangle measuring 8” x 10” x 10”. Cut 8” side into a slight curve.
5. Glue ribbon in rows across the entire triangle, using Fabric Fusion. Pin in place until dry.
6. Glue embellished triangle pointed side up in the center of the T-shirt, 5” up from bottom of shirt. Pin in place until dry.
7. Cut two pieces of stiff felt into a rectangle measuring 13” x 11”. Cut off one corner in a curve on both pieces. Glue pieces over the edges of the embellished triangle, five inches from the bottom of the shirt. Pin in place until dry.

Wig:
1. Cover headband with yellow felt, gluing in place with Fabric Fusion. Hold in place with pins until dry.
2. Cut wig in half from ear to ear, leaving front and back pieces.
3. Glue front half of wig to top of the headband with bangs in the front; holding in place with pins until dry.
4. Using back half of wig, cut off a 3” wide portion at the center of backside. This will leave two equal groups of hair on either side of wig.
5. To form hair bow, use the two equal groups of hair and form loops with the ends meeting in the center. Hold ends together with rubber band. Wrap the rubber band with the 3” wide piece of wig, gluing into place. Hold in place with pins until dry.
6. To complete, glue hair bow to the top of the wig that is glued to the headband.

Miscellaneous NotesAdd to the costume by gluing a foam ball on the end of a black dowel with Aleene’s® Tacky Glue™, covering the ball with glue, and sprinkling with silver glitter for the perfect “pop star” microphone.

Craft on! Click here for today's daily giveaway!

DIY Spider Web Necklace


I love Halloween! And the peeps at iLoveToCreate love it toooo.


Our copy writer Chloe Tatro, is modeling the Black Widow Necklace that took about 5 minutes to make. And if you're like us, you're looking for a fast and easy "costume" for Halloween. So, I came up with this crazy idea to create costume necklaces.


You'll never believe that this is only Tulip 3-Dimensional Slick Paint.
That's ALL!

EeeeeeEeeEeeeK! Chloe's neck has been slashed!

Look closer and you'll see that it's another one of my Tulip 3-D Paint necklaces made to look like bloooood. Eeeeyoooo.

The guys in the marketing department got into it, too. Nate Hough's neck was just the right size for a bigger squeeze of Tulip 3-D Paint to come oozing out in a bloody disguise.

Here's what you need:

Tulip 3-D Red Slick Paint
Teflon Sheet

Here's what you do:
Draw a circle of paint the same size as your neck, and then draw the paint into bloody drips on the sheet. I let it dry overnight to be sure that it's good and dry. Then put it around your neck and connect the ends together. They will stick together, but if you are very active, you may want to hold it together with a safety pin.

The spider web is done the same way with Tulip 3-D Black Slick Paint. Be sure that you connect it completely together so that none of the web falls down. You know, you could also paint a web on a shirt using this idea and have a permanent spider web to wear year after year.

Hey, thanks to Chloe and Nate for your necks….
Happy Halloween!
Pattiewack

Thursday, October 21, 2010

31 Days of DIY Halloween - Skull Party Favors

skull favors

So, you’ve got to plan a Halloween party for the boys, right? And you have to keep a cool factor so no bows, no cutsie, and no frills. Grab glitter and paint, then decorate their drink straws, rice crispy treats, a creepy candle and some gift boxes. They’ll think you’re the coolest mom on the block.

Materials
Tulip® Fashion Glitter™
23560 Black Fine Jewel
Tulip® 3D Fashion Paint™
65000 White
65038 Black
65130 True Red
Aleene's® Spray Acrylic Sealer™
Aleene's® Fast Grab™ Tacky Glue
Aleene’s® Acid-Free Tacky Glue™
Tulip® Glam-It-Up!™ Iron-On Crystals™
25621 Red
26592 AB Crystal
Tulip® Fashion Glitter Bond™
Craft knife or razor blade
Glass cleaner
Paintbrush – 1-1½” and small liner
Glass container
Container (for mixing)
Hole punch
Pencil
Cardboard lollypop cookie sticks
White tissue paper
Wedge makeup sponge
Scratch paper
Foil
Cookie bags
Contact paper
T-shirt – white
Red ribbon
Craft knife
Scissors
Rice Krispy Treats, cut to size and placed on cookie sticks
Binder clip/chip clip
Tape
Felt pen – fine-tip
Stir sticks, straws or rubber bands
Paper towels
Small Chinese food takeout style gift boxes, black
Black and white cardstock
Fun Foam: white, yellow
Patterns – click here for pattern

Instructions:Straw Covers1. Change size of pattern pieces if desired and print.
2. Use a pencil to trace one of each piece onto cardstock and cut out. Use a craft knife to cut out the eyes, nose and corners of mouth on skull.
3. Trace and cut out one “banner” piece from black cardstock and one “skull” piece from white cardstock for each guest expected.
4. Outline skulls with Black Slick Tulip® 3D Fashion Paint™. Before paint dries, add one Red Tulip® Iron-On Crystal™ to each eye. Write each guest’s name on a banner piece with pencil then trace with True Red Slick. Let dry.
5. When dry, use Aleene’s® Acid-Free Tacky Glue® to glue pieces together as shown. Use a hole punch to make two holes: one on top and one on bottom of skull.
6. Slide onto straw or stir stick then use finger to lightly press against paper to create a little wave formation as shown in the photo.

Favor Boxes
1. Fill gift boxes with your preferred goodies.
2. Close the interlocking flaps on the box first, then bring the remaining flaps together and crease them upward where they meet in the center. Glue the flaps together with Aleene’s® Acid-Free Tacky Glue® and secure with binder clip or “chip” clip until dry.
3. Enlarge patterns to desired size and print onto white cardstock.
4. Cut one each of flame background, flame and skull. Use craft knife to cut out the eyes, nose and corners of mouth on skull.
5. Use a pencil to trace one skull onto white fun foam and one flame background onto yellow fun foam for each box. Carefully cut each out. (Do not cut out facial features on skulls.)
6. Use Black Slick Tulip® 3D Fashion Paint™ to color in facial details on the skulls. Tip: When drawing in the teeth, think “upright candy corn” shape for the top teeth and “chicklette” shapes for the bottom teeth.
7. Before the Black Slick dries, add one Red Tulip® Iron-On Crystal™ to the center of each eye.
8. Using cardstock pattern and a pencil, lightly trace the flames onto the flame background pieces. Center the skull pattern and trace the outline inside the flames.
9. Use True Red Slick to color in the flames approximately 1/8” inside flame outline and 1/8” within the skull outline. Immediately sprinkle with Red Tulip® Fashion Glitter™. Let dry then shake off excess glitter onto a sheet of scratch paper and return to container for reuse.
10. Outline flames with Black Slick and let dry.When dry, squeeze needed amount of Aleene’s® Acid-Free Tacky Glue® on back side of box top tab and on the back side of skull. Carefully center flame into glue on back side of box tab, and center skull onto front side of tab, sandwiching tab in between skull and flames. Let dry. Continue with each box until finished

Candle
1. Enlarge pattern as desired with a copy machine.
2. Pour Aleene’s® Acid-Free Tacky Glue® into empty container. Add water and mix until it reaches a milky consistency.
3. Tear tissue paper into 3-5” squares; do not cut with scissors.
4. Clean glass container with glass cleaner.
5. Crumple several torn pieces of tissue then smooth back out to create a wrinkled look. Use a 1-1½ “ wide brush to dab a bit of the glue mixture onto a small area of outside of glass (about 2”). Carefully attach a piece of tissue onto glass, keeping it wrinkled as much as possible, but not folded over onto itself. Once attached onto glass, carefully use paintbrush to dab glue mixture over all of tissue, working out bubbles as needed. Repeat process, overlapping tissue slightly until all of glass is covered. Tear small pieces of tissue and carefully patch holes as needed. Let dry.
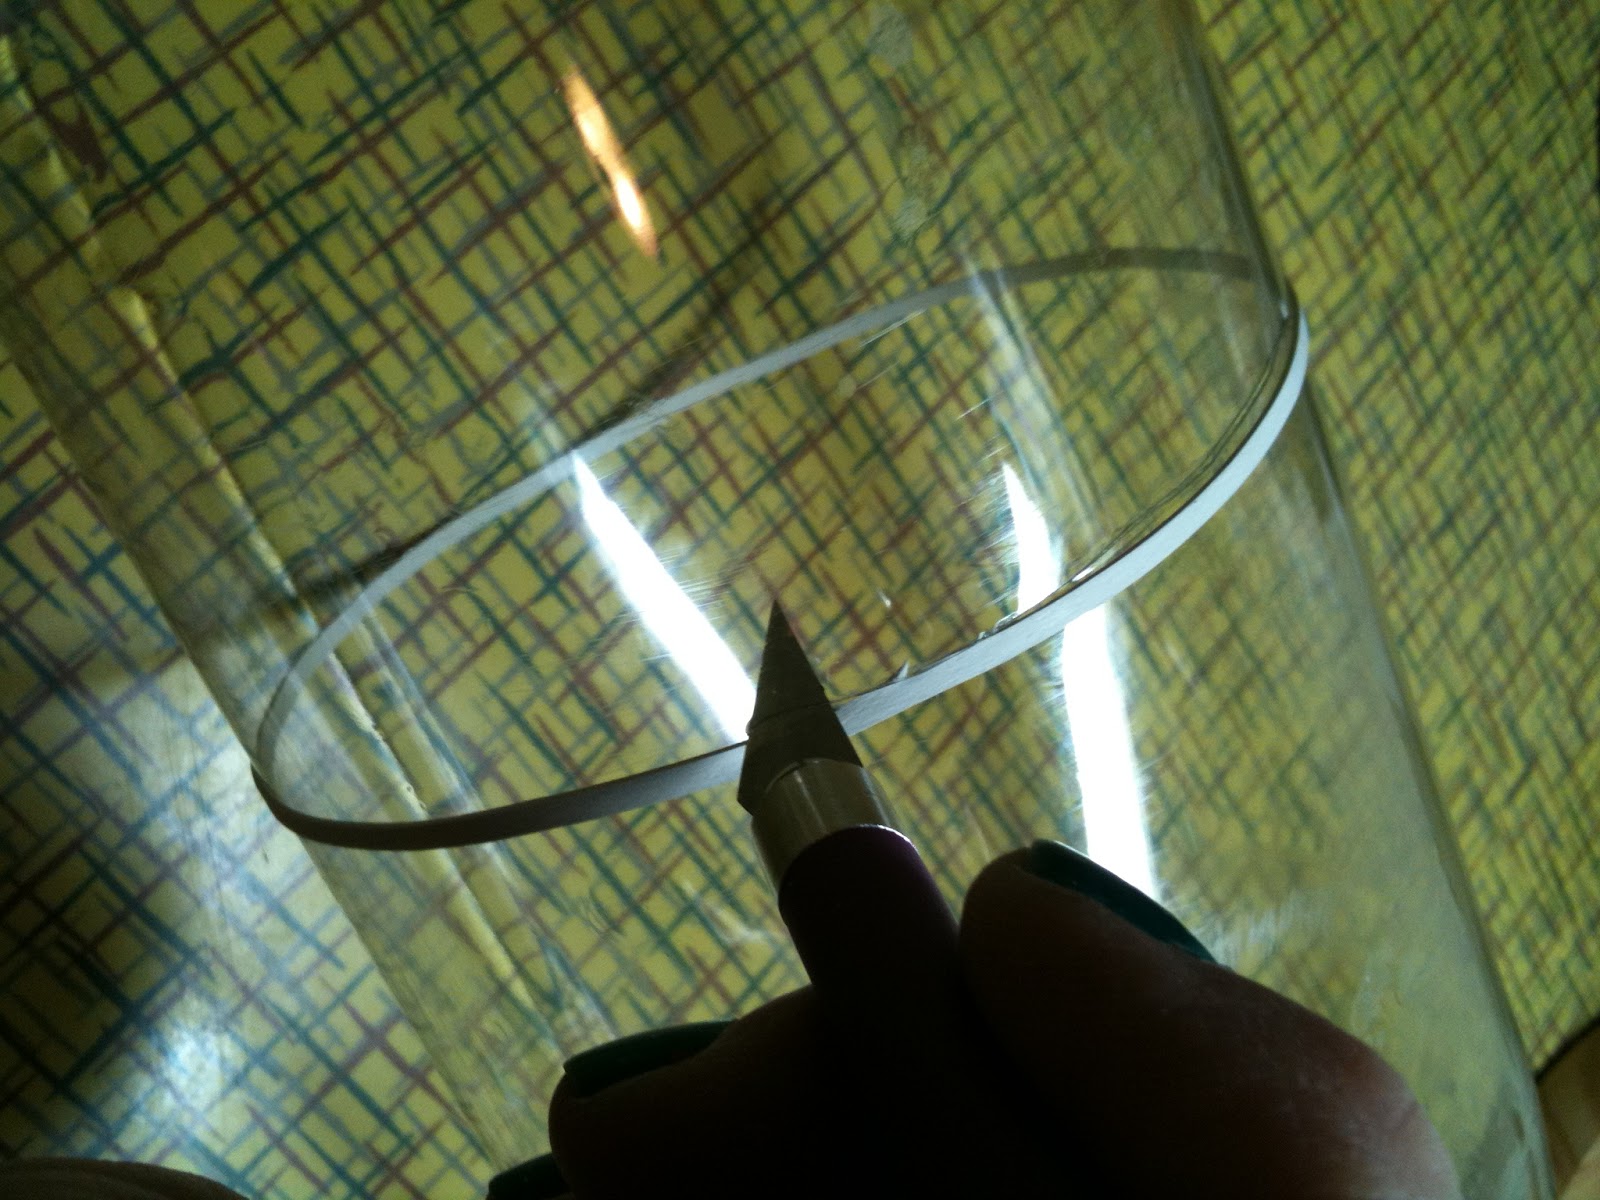
6. When dry, use a razor blade or craft knife to trim excess tissue from the top and bottom edges of glass container.
7. Use fine-tip felt pen to trace enlarged skull pattern onto contact paper and cut out desired number with craft knife. Make sure to cut out eyes, nose and corners of mouth from each.
8. Remove backing from contact paper skull. Stick onto clean white T-shirt and remove to reduce the stickiness on back of stencil. Place where wanted on tissue-covered container. Repeat with remaining skulls.
9. Pour a puddle of Black Slick Tulip® 3D Fashion Paint™ onto a piece of foil. Tap flat end of sponge into paint and dab onto entire tissue-papered surface of container. Use narrow ends and corners of sponge to dab Black Slick into stencil openings (eyes, nose and corners of mouth). Let dry, then carefully remove contact paper.
10. Carefully line up skull pattern inside glass container behind skulls on tissue paper and tape in place. Trace details onto tissue paper with pencil, then outline skulls with Black Slick. Let dry.
11. When dry, spray over all dimensional paint with Aleene’s® Spray Acrylic Sealer™, Matte Finish.
12. When dry, use small liner paintbrush to apply Tulip® Fashion Glitter Bond™ onto eyes, nose and corners of mouth of one skull at a time. Sprinkle with Black glitter. When dry, shake off excess onto scratch paper and pour back into container for reuse.
13. Use small brush to add swirls around skulls as desired with Glitter Bond™. Sprinkle with Red glitter. When dry, shake off excess.
14. Add a candle and enjoy!

Notes
– Be careful not to stack the treat bags on top each other, as they might stick together.

– While the glue is drying, brace something on either side of the fun foam decoration that is heavy enough to hold the box closed and the skull and flame upright and together.

– When working with glitter, make sure your paint or Glitter Bond™ dries completely. After shaking off excess glitter it may be helpful to use a large stiff brush to brush off the rest.

–Don’t overwork the tissue paper with the glue, as it will tear very easily.

– When working with glitter be sure your paint or Glitter Bond™ dries completely. After shaking off excess glitter it may be helpful to use a large stiff brush to brush off the rest.

Craft on! Click here for today's daily giveaway!

Wednesday, October 20, 2010

31 Days of DIY Halloween - Spooky Ghost Vases

ceramic-ghosts

Scary-cute! That’s was I said when I saw these ghost vases. And they can be as scary or as fun as you want them to be, because YOU get to paint their faces. With a flick of the paint-brush, you could turn their scary faces into funny faces. I’m seeing sticks of cotton candy sticking poked into these vases, or maybe black licorice sticks. Yummmmmm……

Materials:
Home Decor Bisque Designs
21779 Slender Free Form Vase 4.5" x 4.75" x 4.5"
21780 Medium Free Form Vase 3.25" x 4" x 8"
Duncan Concepts® Underglazes for Bisque and Majolica
CN 021 Light Saffron
CN 141 Light Aqua
CN 201 Light Grey
CN 244 Really White
CN 253 Dark Black
Signature Brushes
SB 802 No. 1 Liner
SB 807 No. 6 Fan Glaze
SB 808 No. 4 Round
SB 812 No. 10 Round
French Dimensions™
FD 254 Black Licorice
pure•brilliance® Clear Glaze
– Graphite paper
– Pencil
– Water container
– Foil
– Replacement sponge
– Clean, plastic margarine-sized container
– Patterns (click here for patterns)

Instructions: 1. Wipe vase with damp sponge to remove any dust and/or particles.
2. Place graphite paper over the pattern on regular paper, then place graphite side down and onto vase. Trace over the eyes and mouth pattern using a pencil. The graphite should transfer onto bowl in the shape of the ghost face pattern.
3. Using the No. 10 Round Brush, brush three coats of Really White glaze over entire vase, excluding eyes and mouth. Allow time to dry between each application.
4. Using the No. 10 Round Brush, brush two light coats of the Light Aqua glaze onto the inside part of the vase stem, feathering upward toward the top. Allow time to dry between each application.
5, Using the No. 10 Round Brush, brush two light coats of the Light Aqua glaze at the very top of the outside portion of the vase stem, feathering upward onto the “folds” (top portion of the vase). On slender vase, brush Light Aqua glaze onto lower portion of vase where stem and base meet. Allow time to dry between each application.
6. Use the Liner Brush to apply Light Aqua glaze accents under eyes and mouth.
7. Brush one coat of Light Grey glaze over all Light Aqua areas on vase, blending outward.
8. Using the No. 4 Round Brush, brush three coats of Light Saffron glaze to pupil portion of eye area. Allow time for drying between each application.
9. Using the No. 4 Round Brush, brush three coats of Black glaze to remaining eye area, allowing time to dry between each application.
10. Using the same process described in Step 2, transfer hand pattern to vase.
11. Use French Dimension Black Licorice to outline eyes, mouth and hands.
12. Pour necessary amount of Pure Brilliance Clear Glaze inside of vase and rotate to cover entire inside. Pour excess glaze into empty container.
13. Sponge a thin coating of Pure Brilliance Clear Glaze onto entire outside of vase, including face portion, and let dry. Using Fan Glaze Brush, apply a second coating of Pure Brilliance Clear Glaze over entire vase and let dry.
14. Stilt and fire to shelf cone 06.

Craft on! Click here for today's daily giveaway!

Tuesday, October 19, 2010

Terrirific Tuesday! - Halloween Crafts & Ideas

terrorific tuesday 2010 week 3

It's another week and another roundup of Terrorific Tuesday! I can't believe this month has flown by so fast. There's still time to get your craft on, though, and here's some projects to inspire and get you in the Halloween spirit!

Use a 2-liter bottle to make a super cute Halloween cupcake dome with Pattiewack!

Glory shows you how to make Creepy Spider Biscuits with spider Halloween stencils and edible color spray!

Make a funky and functional Plaid Skull&Crossbones Skirt with Excell Crafts!

Vanessa and Erin team up to make Awesome Halloween Cookies in a Jar Crafts complete with free easy to download sticker and label printables!

Cheryl Ball shares her beautiful Embroidery Floss Acorns - the perfect fall accent.

Korinne whips up a spectacular Vintage Style Halloween Wreath on her Crafterella blog.

Make Glow in the Dark Jewelry Using Polymer Clay and Rubber Stamps with Kate at the Rubberstamping About.com page!

Learn how to make festive Pom Pom Pumpkins on the Marvelously Messy blog!

Paint a super easy Pumpkin Pin with Ann Butler to accent your fall wardrobe!

Be a hit at the costume contest with this Corpse Bride Costume by the Crafty Chica!

Alexa Westerfield a.k.a. Swelldesigner shows you how to make a Snooki Painted Pumpkin inspired by the popular Jersey Shore Guidette!

Eileen Hull shares a Cute Halloween Bookmark project that will melt your Halloween heart!

Sebastian is faster than a speeding bullet in his Superman Costume featured on the Sew DoggyStyle blog!

Phyllis Dobbs wows us with this festive Spider Apron perfect for Halloween baking!

Silvia shows you how to make a No-Sew Fuzzy Monster Cuff - the perfect craft project for all ages!

31 Days of DIY Halloween - Paper Pumpkins

paper-pumpkins

You know, sometime simple is good, and these are SO simple and fun to make. Put the supplies for this cute craft in a box and save it for an after school project for the kids when it’s too wet or cold outside. And if you make a ton of them, they would be terrific to scatter down the middle of a party table, or to take to the office to sneak onto your co-workers’ desks for a nice surprise!

Paper Pumpkins
Materials List:– Aleene’s® Crystal Clear Tacky Spray™
– Scissors
– 12” square paper, 4 orange
– Permanent marker, green
– Personal paper cutter
– 12” square paper, green
– Pencil
– Hole punch, large
– 12” square paper, brown
– Pipe cleaners, 9 green
– Patterns (click here for pattern)

Instructions:1. Cut orange paper into 1-1/2” wide strips, using paper cutter.
2. Arrange seven strips in an asterisk shape with ends slightly overlapping in center, making sure they are even width apart. 3. Apply Tacky Spray on one end at time and press together. Let dry.
3. Pull up other ends to middle. Apply Tacky Spray on ends and place together. Let dry.
4. Trace leaf pattern on green paper. Cut out with scissors.
5. Use green marker to draw veins.
6. Punch a hole at center bottom of leaf. Place a pipe cleaner through hole and twist end around pipe cleaner.
7. Curl end of pipe cleaner around pencil. Remove pencil, leaving a curly-q. Repeat with other pipe cleaners, using three per pumpkin.
8. Cut a 1” wide strip of brown paper and roll on pencil. Apply Tacky Spray on end of roll to adhere.
9. Spray one end with glue and press on top of pumpkin. Refer to photo.
10. Wrap pipe cleaners and leaf around stem. Repeat all steps to make other pumpkins.

Craft on! Click here for today's daily giveaway!

Monday, October 18, 2010

Cupcake Cover - DIY Recycle Craft

Halloween Cupcake Dome - I made this Halloween Cupcake Dome to display my delicious carrot cake cupcake with cream cheese icing and a spooky spider, while I dream about how yummy it's going to taste.  I mean, don't you think it's perfect for keeping it fresh and pretty at the same time?
 It all started with a 2-liter orange soda bottle with an orange lid.  
When I went to the convenience store to pick it up, it was the only one in the whole store.  
I purposefully wanted that orange top on my cupcake dome!
 The first thing was to get the label off the side, and Scott jumped 
in with some citrus adhesive remover and saved the bottle from my idea to scratch it off.  
 Worked like a charm...
 I grabbed my heat tool and melted two holes in the top
so I could wire buttons and beads to it.
 Then I put a rubberband around it to establish a cutting line.  
I wanted it just the right height for my cupcake.
 I cut the bottle with a craft knife.
 I added stripes on the lid with a permanent marker, then went through my junk drawer 
to find buttons and objects I could glue or wire to the top.
 The wire went through the inside of the lid, up through the buttons 
and then back through to the inside of the lid.
 After bringing the wires together I twisted them and snipped them off.
 Next, I decided it needed a tassel, so I used my large Pattiewack Tassel Tool and 
black skinny ribbon to wind around the 2-inch section of the tool.
 I added a knotted loop at the top of the tassel and 
brought the ends down to make the hanger.
 Then I threaded a ribbon through the slot in the tool and 
tied a knot to make the neck of the tassel.
 All that was left was cutting off the bottom of the tassel
and slipping it off the tool.
 Two beads slipped over the hanger loop added just enough embellishment, I think.
 Scott gave me this wiring thingy and I glued one on the top to finish it nicely.
And there you have it, my DIY Cupcake Keeper for 
my delicious Halloween cup cake!

31 Days of DIY Halloween - Spider Paper Lantern

spider paper lantern

I’m crazy for this creepy crawly paper lantern. And how easy! All it is, is black paper bugs glued to the paper lantern. The perfect last-minute addition to your front porch light on Halloween night, or to slip over all the lamps in the house for a fabulously fast way to decorate in a creepy sort of way.

Materials:
Collage Pauge® Instant Decoupage
– Lantern, paper
– Color copier
– Cutting mat
– Foil
– Paintbrush at least ½” wide
– Craft knife

Instructions:1. Copy desired number and size of spiders.
2. Cut out each spider on cutting mat, using craft knife.
3. Squeeze out a puddle of Collage Pauge onto a piece of foil. Dip brush in glue and apply on lantern where image will be placed. Immediately, place a spider into glue. Brush Collage Pauge on top of spider.
4. Repeat for all spiders.

Craft on! Click here for today's daily giveaway!

Sunday, October 17, 2010

Thread Fix

I finally decided to tackle my sewing thread today. 
It all started when I was trying to do a craft project on my table and there was no room.

I remembered that I had found one of those cool thread racks at a thrift store for $3 and then another one on sale at Hancocks for $10.  As you can see, there were a few spool rods missing on the one from the thrift store but hey, whaddaya want for 3 bucks, right?
I was so excited because they are normally 15 buck$ each!!
So for $13 and 4 nails, my thread problem is fixed.
Now, back to my craft project....