Thursday, May 15, 2014

Crazy Fun with Mixed Media


I love #Tulip #PuffyPaint, and have been painting with them since the 90s, but this is different than painting on sweatshirts and T-shirts. I decided to take it one step further with stencils and a black canvas. We had a fun time experimenting with dimensional paints yesterday @ilovetocreate and I had a blast! Here's how to do canvas art with stencils:
I used the Lips Motif Stencil from the new #Tulip For Your Home products. First I sprayed the back of the stencil with repositionable adhesive. Then I pressed the stencil onto the canvas, which was already black.

I squeezed red tulip dimensional paint over the stencil and started spreading it with the palette knife. I use lots of paint so it would have deeper dimension. 
I added several more colors and kept spreading it with the palette knife.

Then the next step was the hardest (giggle) because I waited for 10 minutes to let the paint set up enough so that it didn't smear when I peeled off the stencil. I'm really lucky that we have a drying space with lamps so the drying process works faster. 

That's me and Stacy peeling off our stencils. 
It was so cool to see how it turned out!
I really like how that all the paint has so much texture. 

The last step was just to grab a tube of bright neon yellow and write "kiss this!"
I love how it turned out so much that I did another one. This time I used an animal print stencil, polkadot stencil, and a butterfly stencil. You might say I'm addicted to this new idea for using Puffy #Tulip dimensional paints!

Stacy, our Tulip Brand Manager, was having just as much fun as me!  And Miranda was taking quick pics to capture the giddiness.

And of course Miranda had to put it on Instagram. We truly had a fun and creative day here @ilovetocreate!

Saturday, April 19, 2014

How To Make Puffy Paint Easter Eggs!


It's not too late to make these crazy cool eggs with puffy paint! If you don't have egg dye, just grab paint from your craft stash and go for it. 

I sgueezed several colors onto a disposable plate, and grabbed some plastic eggs. 
Then I started rolling the egg around in the paint. I love the swirly design it made. 
It got a little messy, so I took a couple of plastic forks to finish swirling and to lift the egg out of the paint and onto a clean plate. 

Next, I just HAD to sprinkle on some glitter, right??
I let them dry a couple of hours and they turned out so pretty, don't you think? #Tulip @iLoveToCreate #Easter #crafts #EasterEggs #kidsCrafts #PuffyPaint #glitter

Thursday, April 17, 2014

How To make PomPom Easter Eggs!

Are you decorating Easter eggs this year?  Step out from the tradition of dyeing your eggs and try these sweet wrapped creations!  There's even a little pom pom on top to up the cute factor! 

Sunday, April 13, 2014

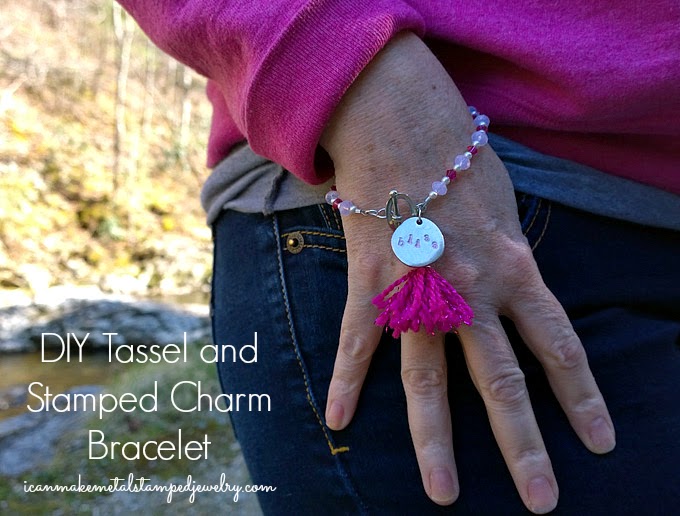
DIY Tassel Bracelets by Margot

My darling friend, Margot Potter has done it again!  She is an amazing jewelry artist and she used her talent to make these adorable tassel bracelets.  They are just perfect for those summer days coming up, when you'll need a breezy little accessory for your strappy sundress or shorts to finish the outfit in style.  Thanks so much, Margot, for taking time out of your crazy fun life, to make something with my little Pattiewack Tassel Tool.  You are a jewelry making rock star!! XOXO

For the details and a fabulous tutorial, go to Margot's cute blog:


Wednesday, March 5, 2014

Pompom Tree - Wow!


I'm always looking for ways to make pompoms and how to decorate things with them, but this takes the cake!   This is part of an event in Finland where they yarnbombed 65 trees. AMAZING!!

You can see the whole store HERE, and don't miss the pics of the cute group of peeps making the pompoms.  So adorable!  The have a sweet facebook page you can visit and LIKE them at.

They also did great doily trees I love.

As always, 
Pompom lover,
Pattiewack


Wednesday, February 5, 2014

Behind the Scenes at iLTC

It's all in a days work here at the iLoveToCreate studios. You never know what we're going to be doing next! These two guys were all too generous to help me hang these giant beachballs as an art installation from the ceiling in our showroom.
 
Yes that's Scott and Bee hanging them from the ceiling with fishing line...about 10 feet high.
Our sales and marketing team plus the creative team painted each and every ball with scribbles paint in every color.

How many balls can you keep in the air at one time?

Saturday, February 1, 2014

Sew Excited!

I have dreamed of owning one of these ginormous cabinets for years! I was lucky enough to get this from a friend a lot less than what I would have to pay if it was brand new, and I ciuld just pee my pants!  Now I'm installing it with all of my sewing stash. There are pockets and cubbyholes everywhere and I love how the back flips up so that I have the cutting table. I'll have to show you how it looks when it's all finished. I wonder what my first sewing project will be?

Thursday, January 30, 2014

Tuesday, January 28, 2014

Behind the Scenes in the Studio Today


Every day we do wild and wonderful dye art, and I wanted to share some of the beauty with you today.
Our experiments become more and more lavish, and Designer Lauri Eaton was hanging up some wet pieces that just blew me away. 
Don't you just LOVE all the gorgeous colors and patterns??

Monday, January 27, 2014

Aleene's 90th Birthday Bash

Aleene, the Tacky Queen of Crafts!


It Is hard to believe that Aleene Jackson turned 90 years old this week! Scott and I were lucky enough to attend her party, and then of course we had to take her a gift! Our chief creative officer, Valerie Marderosian gave us the idea to create a canvas art, with Aleene's portrait and a crown made of tacky glue bottles. Very appropriate, don't you think?


Larry Duncan, owner of iLoveToCreate and owner of the Aleene brand, presented the colorful art to Aleene Jackson. I think she really loved it, and was laughing at how cute her crown was with the tacky glue bottles that she is so famous for.
Alexa Westerfield a.k.a. Swell Designer, got busy with me in the design studio at iloveToCreate and made the collage art with Aleene's picture and paper crown.

How To make Photo Transfers:
Alexa made a graphic image with Aleene's picture,  adding tacky glue bottles and the Aleene's logo in the background and then she colorized it.

The next step was to mirror image the portrait on the computer and then print it on our copier. She glued it facedown onto the canvas with Collagepauge medium

After it was completely dry, we sponged it with water and rubbed the paper completely off the canvas, leaving only the ink on the canvas. 

The last couple of steps were to paint the sides of the canvas with gold paint, then spray sealer over the entire piece. 

Alexa created some cute graphics with Aleene and her tacky glue helmet for the birthday card. Then we took it to sales and marketing to have everyone sign. Aleene laughed when she opened the card and saw herself wearing a glue helmet and all the Tacky Glue fun.
Scott and I were able to sit and chat with her for a while. We talked about our memories of being on the Aleene's Creative Living television show. We truly enjoyed our time with Aleene!

Happy birthday Aleene!

Tuesday, January 21, 2014

Banners Of Hope - Promoting the Healing Art of Crafting

Pattie Wilkinson

A display of “Banners of Hope” Project banners was created by CHA designers and displayed at the CHA 2014 Show.  The banners were donated to the “Charity Wings” www.charitywings.org outreach program for their charity promotional event, held January 15-16, 2014, to be broadcasted on the web.  The banners will also be used by the Charity Wings traveling exhibit to promote the healing art of crafting

I loved making my Banner of Hope.
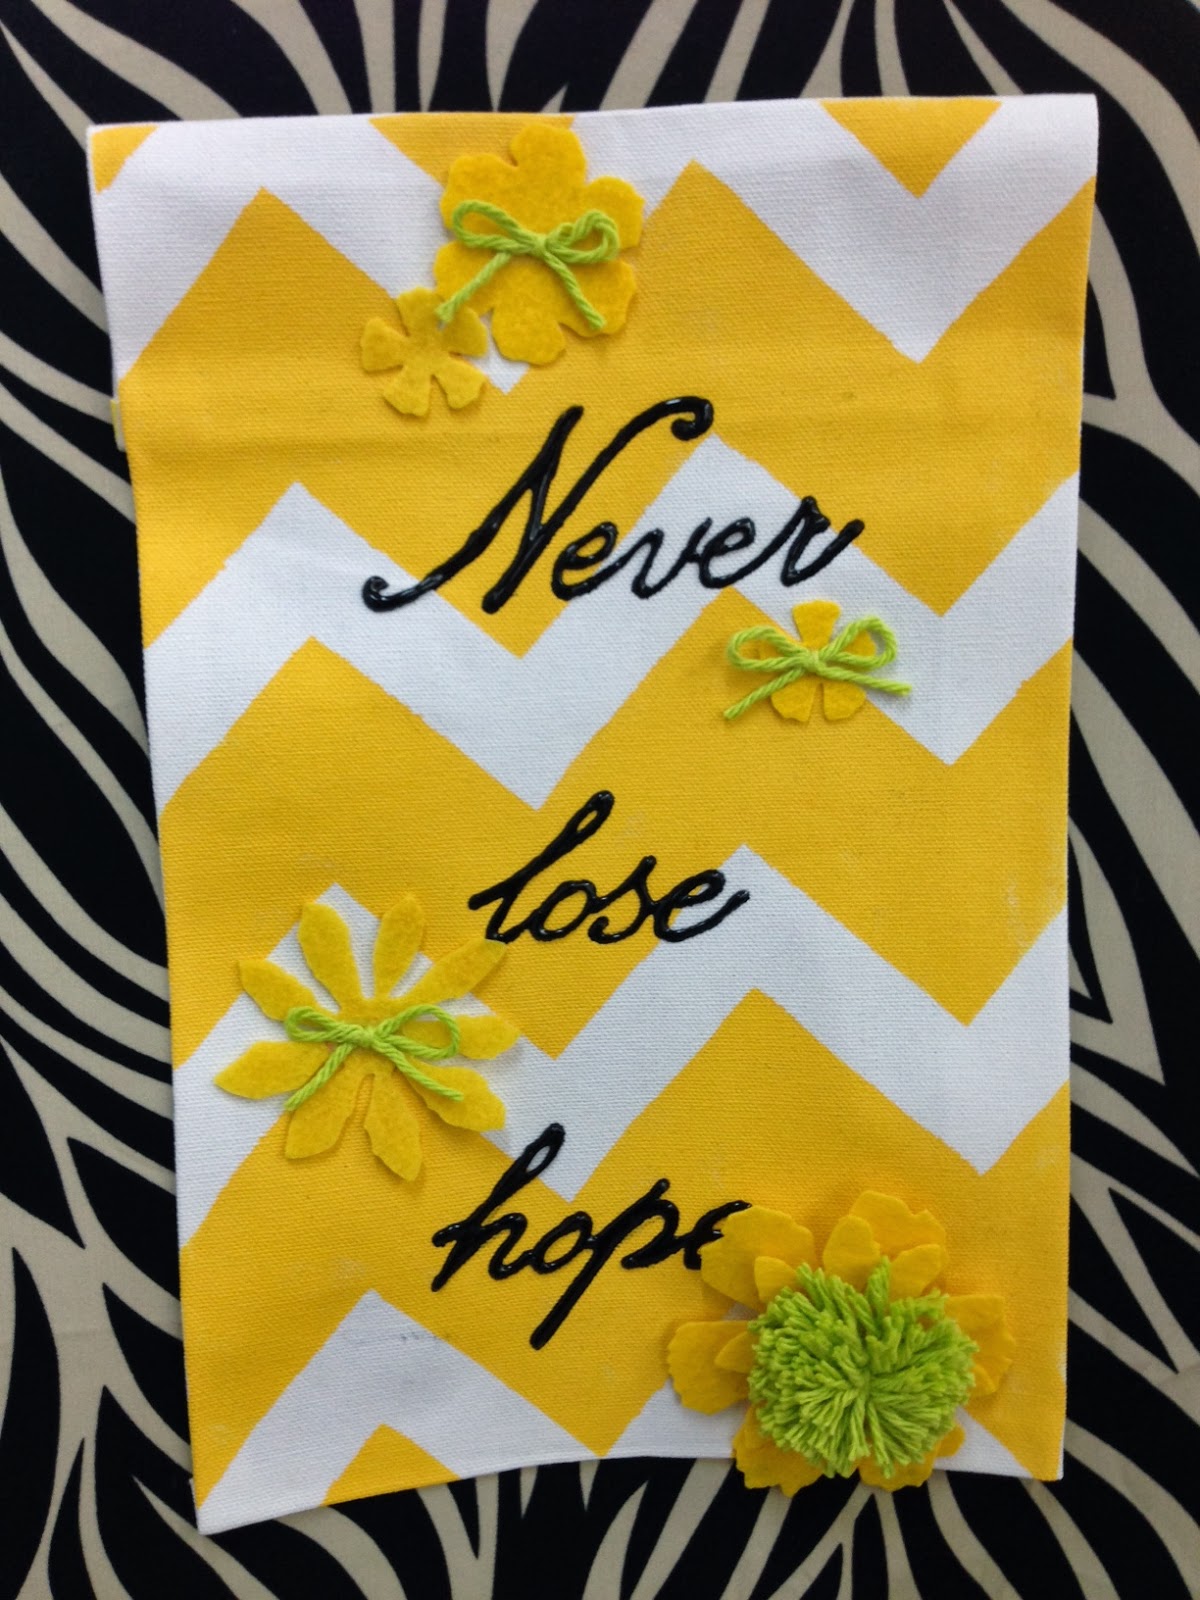
First I used masking tape to make chevron stripes and then painted it with Tulip Soft Paint in Sunflower.  After it dried I peeled away the tape and wrote "Never lose hope" with Tulip Puffy Paint. It took 2 or 3 hours to dry after that, and then I cut out felt flowers and glued to the banner with Fast Grab Tacky Glue.  Of course, it simply HAD to have at least one pompoms, so I made a quick yarn pompom with the Pattiewack Pompom Tool and glued it onto the big felt flower.  To finish the cuteness I tied some yarn bows and glued them in the centers of 3 of the felt flowers.  

I am happy that Charity Wings will be hanging it somewhere that will bring a little glimmer of hope to someone.  But I have to say that I really enjoyed the fact that I was part of a fabulous group of Designers through the Fabric Arts Council.  If you were on of the designers, I just want to say thanks for including me!  

Here are just a few of the dozens of banners created by designers and 
people who want to share hope:


Saturday, January 18, 2014

#CHAshow Behind The Scenes @iLoveToCreate !!

All of our iLoveToCreate team had a great time at the 2014 Craft and Hobby Tradeshow!  Our booth this year was loaded with artful inspiration and we had a blast sharing the work of our talented team with attendees.  A lot was going on in our booth...from me decoupaging a mannequin with recycled magazines, to enthusiastic tie dye action from our favorite reality TV star Rupert Boneham.  Let me take you on a mini tour of all the activity!

Sunday, January 5, 2014

We are on the COVER of Fresno Life Magazine this month!!

Fresno Life Magazine


Wowza!  Scott and I had no idea when Valerie Marderosian asked if she could interview us, that we'd end up on the COVER of the local magazine.  Valerie has become a Contributing Writer for Fresno Life Magazine, and she is also the Chief Creative Office at iLoveToCreate here in Fresno where Scott is the Corporate Videographer and I'm the Lead Designer/Spokesperson.  


We had so much fun being interviewed by Valerie as she asked questions about how we met, what was the big attraction, and how we keep it together as a couple, since we live and work together.  Because this issue is the "Love" issue, she was really interested in our relationship.  It was fun to tell our story!

We've only been in Fresno four and a half years, but we've set our roots here by buying a house and becoming part of the community.  We love the wineries and the closeness to mountains, the beach, and to the big cities of San Francisco and Los Angeles.  Any of these major destinations can be enjoyed over a weekend.  Plus, we've made lifelong friendships with co-workers.  Our families are in Washington, Oregon, Mississippi, and Oklahoma, so they enjoy having a California destination.


Thank you Valerie, for a fabulous experience, and a really fun article about me and Scott!

If you want, you can pick up a copy at Michael Blunt's Salon & Bistro, Kristina's Natural Ranch Market, Fresno Ag, and The Diamond Learning Center, or subscribe online on the Fresno Life Magazine Facebook page.

Wednesday, January 1, 2014

How To Make Ice Candles with Pattiewack!

DIY Video - Ice Candles


If you're stuck in the snow and looking for something fun to make, or you just love candles, here's a fun idea to start out the New Year.  It's that old-fashioned ice candle craft that you probably saw your mom or gramma make when you were a kid.  It's just so cool to think that ice and wax can be put into a milk or ice cream carton to make pretty ice candles, right?

Here's what you'll need:
  • Recycled wax-lined Cartons (ice cream, juice, milk, soup)
  • Taper candles
  • Ice Cubes
  • Wax (candle wax, crayons, recycled pillar candles, paraffin)
  • Foil-lined Cookie Sheet
  • Double-Boiler (I like to use an electric wok and a 2 lb. Coffee Can)
  • Oven Mitts
  • Scissors
 I hope you have a fabulous New Years Day!  They say that whatever you do on the first day of a new year is what you'll be doing throughout the year, so I say....do something creative, and
Have Fun With It!


Tuesday, December 31, 2013

YouTube Subscribers on PattieWackDesigns Channel - Now 6,999!

Be the 7,000th YouTube Subscriber and 

WIN a Complete PattieWack Tool Kit worth $50!


http://www.youtube.com/user/PattieWackDesigns


Can you believe it?  You guys have bumped up the number of subscribers on the PattieWack Designs YouTube channel to 6,999!  Scott pointed it out to me a few minutes ago and I freaked!  
I knew it was growing, but wow!

Here it is the last day of Year 2013 and I feel like I'm going out with a bang.  
This year has been huge for me at PattieWack Desgins.  
I am launching our NEW PattieWack.com website and we completely 
revamped the PattieWack Blog to match the new website.  
It took several months to make it happen, but I'm finally ready to reveal it.  


I'm also on the verge of hitting 

1.5 MILLION VIEWS 

on the YouTube Magazine Roll-ups Video!


And it's all because of YOU that I can share what I love, and keep the projects and videos coming!

So, if you haven't already, SUBSCRIBE to the YouTube PattieWack Designs channel 
by simply clicking on the 'subscribe' button while watching ANY VIDEO.  
We'll get a notice that you're #7,000 and you'll receive a complete set of Pattiewack Tools!


Go to the PattieWack Designs Channel:

Click on the box: SUBSCRIBE

That's all there is to it.
Good Luck & HAPPY NEW YEAR!


DIY Leopard Print Heels

Here's a cool sparkly pair of kicks to enjoy for New Year's that I literally whipped up in under 30 minutes!  They are such a cool way to make a statement with that little black dress at your party and what girl doesn't love a little bling to ring in the new year?